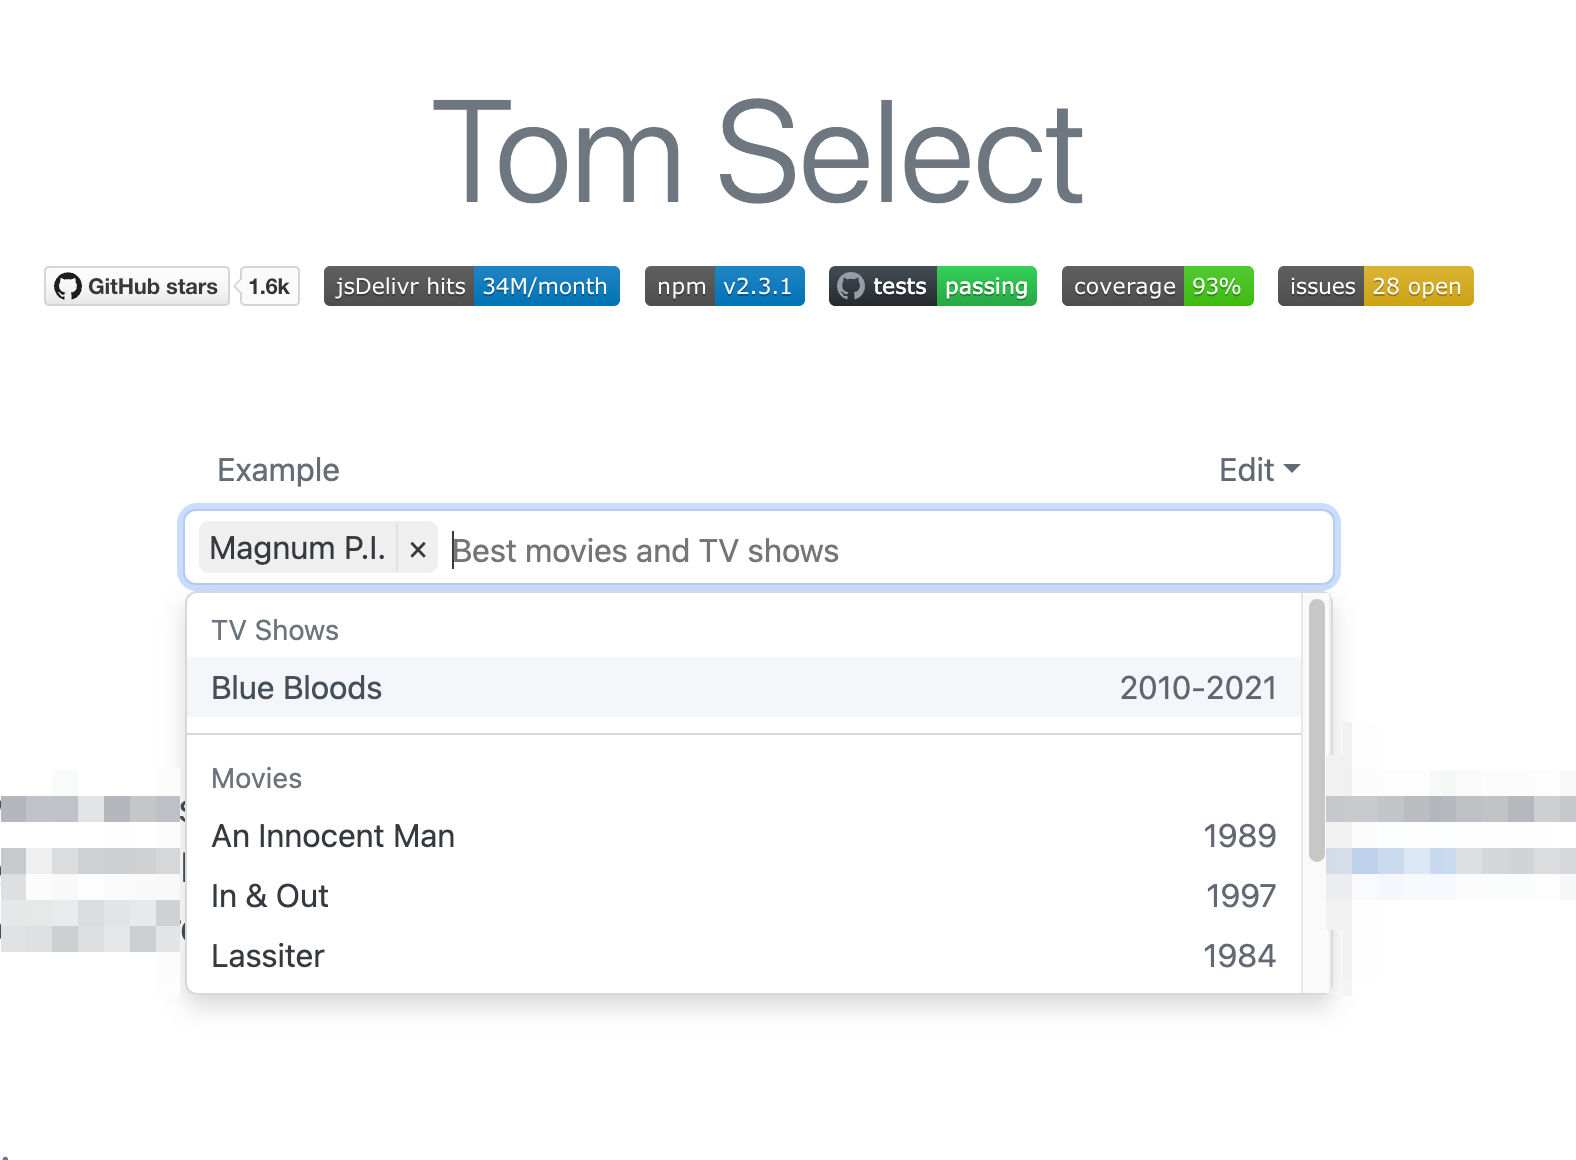
Creating a Multi-Select with Tom Select and Stimulus in Rails

Intro
In modern web applications, providing users with intuitive and powerful form inputs is crucial for a great user experience. One common requirement is a multi-select component that allows users to choose multiple options from a list, often with search functionality and custom styling. In this blog post, we'll explore how to create such a component using Tom Select and Stimulus within a Rails application.
What is Tom Select?
Tom Select is a powerful, lightweight (~16kb gzipped) and flexible <select> UI control. It's designed as a more lightweight alternative to libraries like Select2 and Chosen, with a focus on performance and extensibility.
Setting Up
First, let's set up our Rails form with a multi-select input. Here's an example of how you might structure the select_tag for your form. Note the data-controller="multi-select" attribute. This is how Stimulus will hook into the DOM element later.
  <div class="my-5">
    <%= form.label :regions %>
    <%= select_tag "report[regions][]", options_for_select(@valid_regions, report.regions), { data: { controller: "multi-select" }, multiple: true, class: "multi-select add-styles-here" } %>
    <%= field_errors(report, :regions) %>
  </div>
Stimulus Controller
Now let's create a Stimulus controller to initialize and manage the Tom Select component. In this controller, we initialize the Tom Select library and handle the lifecycle events of the component. When the ERB Form above is rendered, and a data-controller="multi-select" attribute is added to the select tag, the Stimulus controller will be initialized and update our DOM with the Tom Select element. From here, we can add any additional options to Tom Select via their implementation docs. In this example, we are using a custom clear button and remove button and styling those with Tailwind.
Additionally, we can check if any grouping options are passed into our controller for Tom Select to manage.
While more options are available, This gives a basic example of how to get started.
From here, we iterate based on our application needs.
import { Controller } from '@hotwired/stimulus';
import TomSelect from 'tom-select';

export default class extends Controller {
  static values = {
    isMultiple: Boolean,
    isGrouped: Boolean,
    optionGroups: Array,
    options: Array,
  };

  connect() {
    this.initializeTomSelect();
    document.addEventListener('admin_lock:removeDisabled', this.enable.bind(this));
  }

  disconnect() {
    this.destroyTomSelect();
  }

  initializeTomSelect() {
    if (!this.element) return;
    // Note: We are always using Tom as a multi select - otherwise use Rails Select
    this.element.setAttribute('multiple', true);

    this.select = new TomSelect(this.element, {
      plugins: {
        remove_button: {},
        clear_button: {
          title: 'Remove all selected options',
          className: 'text-2xl clear-button',
        },
      },
      placeholder: 'Select...',
      hidePlaceholder: true,
      maxOptions: 1500,
      labelField: 'name',
      searchField: ['name'],
      ...this.additionalGroupingOptions(),
    });
  }

  additionalGroupingOptions() {
    if (!this.isGroupedValue) {
      return {};
    }

    return {
      optgroupField: 'groupName',
      optgroups: this.optionGroupsValue || undefined,
      options: this.optionsValue || undefined, // Use with optgroups to match groupName
      render: {
        optgroup_header: function (data, escape) {
          return (
            '<div class="font-bold text-purple-950 px-4 py-2">' + escape(data.label) + '</div>'
          );
        },
      },
    };
  }

  destroyTomSelect() {
    if (this.select) {
      this.select.destroy();
    }
  }

  enable() {
    this.select.enable();
  }
}
A full Controller example with Grouping
def some_controller
  #Grouping Example:
   @option_groups = [
      { value: "group_id_1", label: "Group 1" },
      { value: "group_id_2", label: "Group 2" }
    ]
    @option_values = options.map do |record|
      {
        groupName: record.group_id,
        # options_for_select will look for value and name automatically be sure to include them
        id: record.id.to_s,
        value: record.id.to_s,
        name: record.name,
        label: record.name,
        # You can add any additional meta data here for future use in the Stimulus controller / Rails Controller
      }
    end
    @options_for_select = @buyer_select_options.map { |o| [o[:name], o[:id]] }
end
<%= select_tag "q[buyer_id_in][]",
  options_for_select(@options_for_select, params.dig(:q, :record_id_in)),
  {
    data: {
      controller: "multi-select",
      "multi-select-is-grouped-value": true,
      "multi-select-option-groups-value": @option_groups,
      "multi-select-options-value": @select_options,
    },
    class: "multi-select"
  } %>
Now when our form is rendered, we will have a multi-select input that looks like this Tom Grouping Example
Conclusion
In this blog post, we've seen how to create a multi-select component using Tom Select and Stimulus in a Rails application. We've covered the basic setup, how to initialize the Tom Select library, and how to handle additional options and styling. This approach allows for a powerful and flexible multi-select input that can be easily integrated into your Rails forms.